
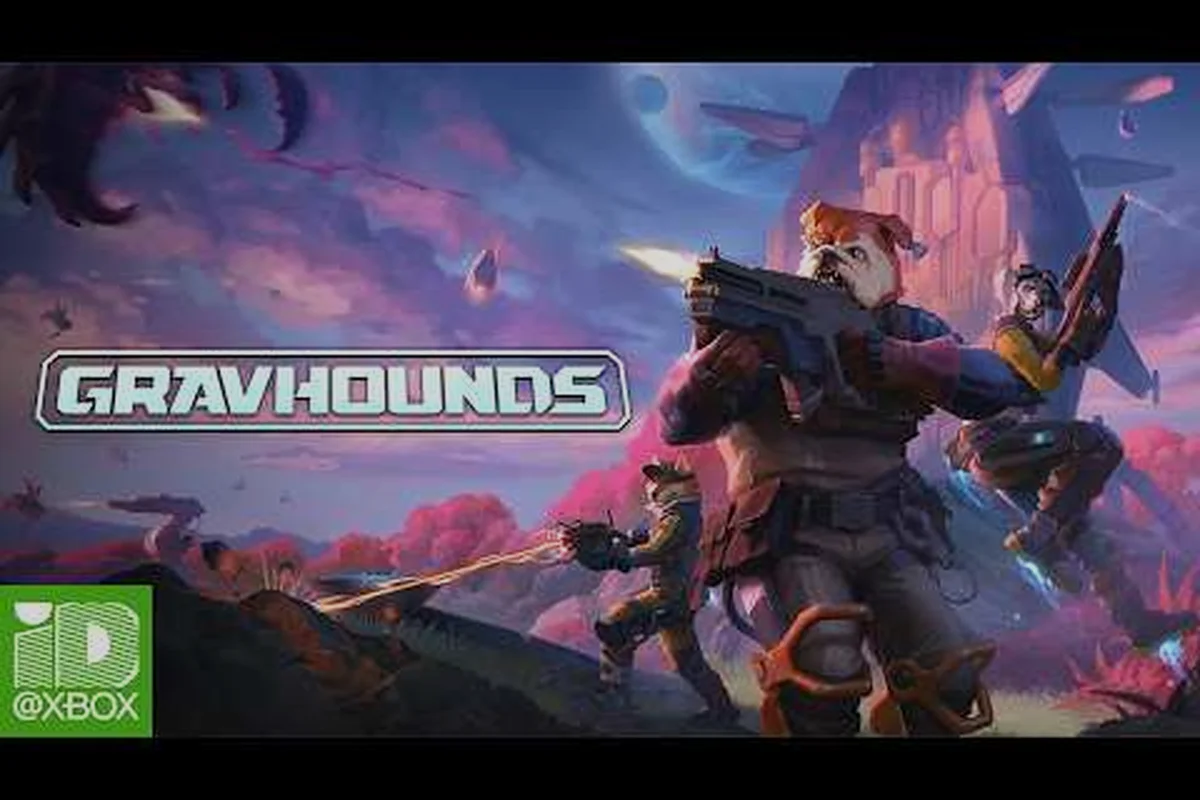
Mastering GRAVHOUNDS’ grav beam against enemies turns crowd control into a battlefield advantage. Use GRAVHOUNDS to fling or throw enemies into hazards, interrupt a swarm’s attack formation, and dictate where each body lands before it reaches your squad. For example, pulling a clustered enemy into an environmental hazard can create space for a heavy weapon without exposing GRAVHOUNDS to point-blank fire. Because the grav beam displaces targets rather than simply damaging them, positioning and the enemy’s landing zone determine whether the ability buys safe firing distance or causes a dangerous counterattack.
How GRAVHOUNDS Grav Beam Enemies Change Every Encounter
The grav beam gives GRAVHOUNDS players a way to redirect danger rather than merely eliminate it. A standard weapon reduces an enemy’s health, but the beam can move that enemy through the arena, creating collisions, interrupt patterns, and exposing targets to environmental threats. That distinction matters when a standard attack would merely exchange damage while a well-placed fling can thin several targets at once.
The best way to understand gravhounds grav beam enemies is as a positioning puzzle. You must decide whether each target is more dangerous in its current location, whether it can be used to block another threat, and whether the surrounding terrain offers a meaningful consequence. A beam used at maximum strength without a plan is usually less valuable than a measured lift that sends a creature into a cluster.
The practical value of redirected enemies
Successful redirection creates secondary pressure. Instead of chasing a wounded creature around cover, you can place it where it interferes with allies, interrupts a charging line, or absorbs attention from another target. This is especially valuable against groups whose danger increases when they remain together.
| Use of the grav beam | Immediate effect | Best tactical purpose |
|---|---|---|
| Lift a nearby target | Remove it from the ground briefly | Reposition priority threats |
| Fling it across open ground | Carry momentum into another group | Cause collisions and crowd damage |
| Drop it near a hazard | Change the target’s final position | Deal environmental damage |
| Redirect an approaching enemy | Break its approach line | Protect a teammate or objective |
| Pull a target into a beam lane | Compress enemy spacing | Increase friendly-fire efficiency |
A broader overview of enemy roles, movement patterns, and resistances can improve recognition before the next battle. The GRAVHOUNDS enemy guide is especially useful when you need to distinguish a dangerous melee unit from a fragile target that makes an ideal projectile.
When a fling is worth the setup time
A beam attack becomes less attractive when the target is far away, moving unpredictably, or protected by allies that immediately scatter. It is strongest when a short route leads toward a hazard, a group, or an objective that must remain uncontested. Think in terms of value: a two-second setup that interrupts three enemies can be better than an instant attack that only damages one.
| Situation | Beam value | Reason |
|---|---|---|
| Dense cluster in open space | High | A collision can affect multiple targets |
| Hazard beside the route | High | Position determines the payoff |
| Single distant enemy | Low | Travel time leaves the group exposed |
| Crowded defensive objective | High | Redirected bodies obstruct attackers |
| Fragile target beside allies | Medium | The impact may harm friendly units too |
| Enemy already airborne or moving quickly | Low | Predicting the landing point is difficult |
Community reports consistently treat the beam as a group-control tool, not simply an alternate damage dealer. The strongest results come from practicing trajectories and learning which enemy categories can be redirected without disrupting the rest of the squad. For example, a compact pack of ground enemies can be redirected toward a hazard or objective lane, while a single distant target rarely justifies the setup time. This distinction matters because a crowded defensive objective can turn redirected bodies into an obstruction, whereas fragile units beside allies may cause friendly damage that offsets the beam’s control value.
Flinging and Throwing GRAVHOUNDS Enemies Effectively
A reliable fling follows three stages: acquire the target, select a destination, and release at the correct point. The destination matters more than raw power. A distant wall may look dramatic, but a nearby hazard cluster or a choke point often creates a better result because fewer aiming errors can separate the target from its intended path.
Reading the battlefield before aiming
Start with the enemy’s approach vector, not its health bar. GRAVHOUNDS gravity enemies often become dangerous because their path intersects yours or your teammates’, so moving them sideways can be more valuable than moving them farther away. Before releasing the beam, scan for hazards, groups, friendly fire zones, and the direction in which the target will continue after landing.
| Target location | Better result | Common mistake |
|---|---|---|
| Just before a hazard | Maximum environmental effect | Throwing the target past the hazard |
| Center of a packed group | Multi-target disruption | Aiming at the nearest edge |
| Across an enemy firing lane | Interrupts pressure | Launching away from the lane |
| Behind friendly cover | Gives your team breathing room | Pulling it toward the team |
| Into open ground | Creates separation | Expecting damage without a hazard |
Players who treat a throw as an arc-planning problem tend to perform better because they stop focusing on the beam’s visual effect and start tracking where the enemy will land. The object is not simply to make the target fly; it is to make its landing strategically meaningful.
Account for interruption and friendly danger
Before committing to a long cast, check whether the target can escape the effect, whether another enemy can interrupt the beam, and whether the landing area is safe. Even a strong tactic fails when it places your squad under friendly fire or removes the only body blocking an entrance.
-
Short cast: Favor a nearby obstacle or packed group when enemies are closing quickly.
-
Long cast: Use it when the target’s momentum needs to reach a distant hazard.
-
Sideways cast: Redirect charging units across a lane instead of sending them deeper into your formation.
-
Vertical drop: Look for elevated targets or a path over cover where the landing point matters more than distance.
-
Combo finish: Begin with a shove that creates space, then redirect the retreating target into the crowd.
The grav beam weapon overview provides a useful companion reference when deciding how the beam fits alongside conventional weapons and other crowd-control tools. In practice, treat the grav beam as a positioning tool rather than a replacement for sustained damage: use a shove to break a gravhound’s approach, then use the beam to redirect it into a hazard or exposed lane. Because redirection can place enemies near your squad, confirm that the beam’s path and landing area do not create friendly-danger problems, especially when multiple gravhounds are converging on the same entrance.
Swarm Attack Tips for Controlling GRAVHOUNDS Gravity Enemies
Large enemy groups create the best opportunities for gravhounds fling enemies and gravhounds throw enemies. Yet a swarm is also the easiest formation to disrupt accidentally, so the goal is not to throw every target into the largest possible collision. It is to select targets whose movement will reinforce your defensive plan.
Prioritize the unit that changes the formation
Strikers, support units, and large targets should rarely receive identical treatment. A support unit may be dangerous because it strengthens the group, while a large body can act as a moving obstacle even if it survives the impact. Identify which enemy is controlling the swarm’s tempo, then redirect that unit toward the least dangerous space on your side.
| Enemy role | Preferred beam target | Desired result |
|---|---|---|
| Fast attacker | Yes, when its charge is active | Break the charge and collide it with allies |
| Support unit | Yes | Remove the amplifier before it affects the formation |
| Heavy target | Sometimes | Use as a projectile only when its landing is useful |
| Distraction enemy | Rarely | Let it continue if it occupies attention |
| Fragile unit | Sometimes | Redirect it when damage and interruption both matter |
The central rule is value over spectacle. A long throw that lands in empty space may look impressive, while a short, accurate push can break an enemy’s attack or move it away from a teammate. Community experience favors deliberate casts during readable moments rather than constant experimentation during a chaotic wave.
Create layers instead of one large trap
A single trap becomes easy for the swarm to avoid. Layer your attacks by placing one redirected enemy near a hazard and another closer to your formation. This creates two distinct problem areas, forcing the group to split its attention. It also reduces the impact of a missed cast because the first displaced enemy still disrupts movement.
Useful setups include arranging the redirected gravhounds so their landing positions support one another. For example, place one grav beam target on a narrow route beside a teammate, then use a second beam to pin another enemy at the formation’s flank. This creates overlapping threat zones without making every enemy occupy the same danger zone, giving your team more time to focus fire and reposition.
-
Hazard and choke point: One target lands in the hazard while another blocks the route leading to it.
-
Crossfire lane: Two light enemies are redirected into opposite lanes, interrupting targets from both sides.
-
Doorway screen: A heavy enemy becomes a temporary barrier while a smaller unit lands behind your line.
-
Retaliation pocket: A target is dropped near a teammate so any pursuing enemy must cross the same area.
Broader crowd-control methods can complement this approach. The swarm defense tactics outline additional ways to preserve space and avoid becoming overwhelmed when the number of active enemies exceeds your team’s normal firing capacity.
GRAVHOUNDS Enemies by Planet and Battlefield Position
Different environments change how valuable gravity manipulation will be. On an open planet, long casts have room to work, but enemies also have more approaches. Inside a compact area, short redirects and hazard placements become more reliable because the swarm cannot spread out. Understanding gravhounds enemies by planet starts with the terrain rather than with a fixed enemy ranking.
Match the tactic to the arena
| Battlefield type | Best beam approach | Main advantage | Main risk |
|---|---|---|---|
| Open field | Long, deliberate fling | Long collision routes | Enemies can approach from multiple sides |
| Rocky terrain | Hazard-assisted drop | Natural impact points | Bounces may be difficult to predict |
| Compact outpost | Short side push | Compresses an advancing group | Friendly fire and blocked escape routes |
| Low-ceiling area | Low-height redirect | Stops long charging runs | Limited launch direction |
| Elevated position | Downward drop | Attacks enemies below the squad | Long fall can waste the cast |
| Narrow canyon | Cross-lane fling | Redirects a whole column | Misses can send targets farther away |
No planet-specific list can replace direct observation because layouts, hazards, and enemy mixes can change the value of every cast. Based on community testing, the safest approach is to identify two repeatable features per arena: one hazard worth using and one lane worth blocking. This gives you practical targets when a swarm compresses.
Read enemy behavior before committing
Some gravity enemies telegraph a straight approach, which makes side redirection effective. Others remain close to allies, so throwing them into a crowd may hurt that crowd as much as the original target. Observe the first attack, note whether the unit keeps moving during the beam effect, and avoid relying on a landing point that the enemy can trivially escape.
| Observation | Beam response |
|---|---|
| Predictable straight charge | Redirect across the approach route |
| Constantly circling target | Push it away from the protected zone |
| Enemy stays linked to allies | Throw toward its own formation |
| Target flees after release | Expect limited follow-through |
| Enemy occupies a key doorway | Use it as a short-range obstacle |
| Target ignores nearby danger | Prefer environmental placement over pursuit |
The planet-specific swarm guide explains why the same grav beam can behave differently across stages: enemy mass, movement speed, and swarm density determine whether a redirection displaces one Gravhound or carries it through nearby targets. On a crowded planet, test a lateral throw before using a full-range fling, since the beam may continue affecting the struck enemy during the knockback. If the target retreats after release, shorten the aiming window rather than committing to a long pursuit.
Advanced Beam Combos for Difficult Enemy Waves
The most advanced use of the grav beam is sequential rather than isolated. Each displacement changes the positions, timing, and options for the next attack. A useful combo might force a target into a restricted area, then use that target to interfere with a second group while the squad concentrates fire on a priority target.
Sequence positioning around a single objective
Start by placing the most dangerous enemy just outside your objective’s immediate defense area. Next, redirect a second enemy so its landing point blocks the likely approach. Finally, use conventional fire to eliminate the target that matters most while the redirected units remain unstable. The objective is to make the squad’s attacks count by preventing enemies from occupying useful positions.
| Combo stage | Action | Reason |
|---|---|---|
| Preparation | Clear the intended landing area | Reduces accidental friendly damage |
| First displacement | Redirect a priority enemy | Breaks an imminent attack pattern |
| Second displacement | Block a likely approach | Prevents the group from flowing around you |
| Focus fire | Eliminate the dangerous target | Use the opening created by displacement |
| Cleanup | Redirect weakened stragglers | Prevent a disorderly retreat |
This method is especially effective when one well-placed enemy can produce two outcomes: damage from an impact and interference with other units. Players often improve faster by planning two-target combos than by memorizing complex sequences for every possible encounter.
Keep a fallback for missed casts
Every advanced combo needs a recovery plan. If the first throw misses, do not commit to a second long cast in the same direction. Switch to short-range pressure, reposition, or use another weapon until the field becomes readable again. If the first cast lands well, follow with a barrier play that makes the enemy’s new position work for your squad.
-
Landing short: Redirect again toward the group instead of trying to reach the original target.
-
Landing too far: Block the pursuit route while the distant enemy is isolated.
-
Friendly danger: Drop the target behind cover and move the squad sideways.
-
Target survives: Keep it in the impact zone for a second shot.
-
Swarm rearranges: Redirect the new front edge rather than chasing the original formation.
The defense-wave reference is a strong companion for tracking spawn timing and deciding when a crowd-control window is worth prioritizing over continuous shooting. When a grav beam enemy is approaching the squad’s rear, use the next-wave timing to judge whether a barrier play can safely turn the target into a contained impact zone; if the wave is about to add another gravhound, preserve mobility and short-range pressure instead of extending the cast. This lets you chain grav beam positioning with swarm control without sacrificing the fallback plan for a missed cast.
Frequently Asked Questions
Can the grav beam kill enemies by throwing them into hazards?
Yes, environmental impacts can damage or kill a redirected enemy, but the exact result depends on the hazard, fall distance, and enemy behavior. The most reliable technique is to test one target first, observe the damage and trajectory, then reuse that route with similarly sized enemies instead of assuming every target lands identically.
Should GRAVHOUNDS players throw every enemy into a group?
No. Throwing into a group is useful when the redirected target is durable enough to collide with others or when disrupting that cluster matters more than preserving your firing lanes. Small or fragile enemies may produce little collision damage, so placing them near a hazard or blocking a route can be better.
What is the best way to handle a large swarm with a grav beam?
Keep one target in the group, use the beam to redirect a second into it, and reserve regular weapons for the most dangerous unit. Repeat the pattern only when the landing area remains safe. This layered approach is more dependable than repeatedly throwing enemies toward the same crowded location.
Does the grav beam work well against gravity enemies on every planet?
It can, but terrain changes the technique. Open areas support long throws, compact arenas reward short redirects, and hazardous planets favor deliberate drops. A fixed strategy is less reliable than identifying the arena’s hazard, approach lanes, and safe fallback position before the swarm arrives.