
Learning gravhounds demo how to play matters because a successful drop depends on clear priorities, disciplined gathering, and a timely exit. In the demo, treat available cargo as a decision problem rather than a checklist: secure the highest-value run first, avoid overextending during the gather phase, and leave enough time to reach extraction before the operation turns hostile. A practical route should separate the cash pickup from the extraction point, account for nearby threat markers, and use a quick inventory check to confirm whether the remaining time justifies another stop. The result is a more deliberate first run and a better chance of extracting with useful cargo instead of losing a promising haul to a late exit.
Gravhounds Demo How to Play: Your First Expedition
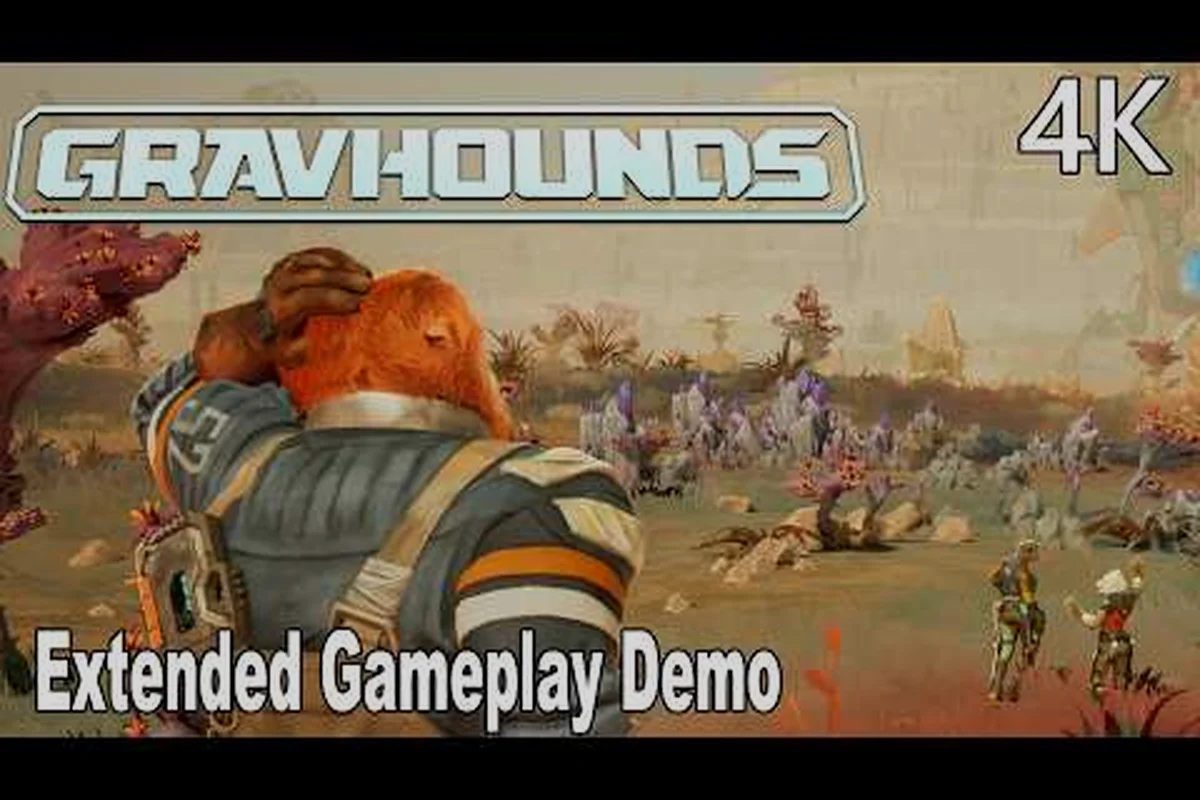
The demo introduces GRAVHOUNDS through a repeatable expedition loop: land on a planet, complete work, gather materials, protect your crew, and extract before the situation becomes overwhelming. The official four-minute-twenty-second GRAVHOUNDS gameplay overview from ID@XBOX provides a useful visual reference for the core sequence.
A first run should prioritize understanding the complete loop rather than maximizing cargo. Players who move directly from landing to constant mining often arrive at extraction with little preparation and no clear escape plan. A better approach is to establish a compact work area, gather the materials needed for a job, preserve enough capacity for valuable finds, and leave while the route is still manageable.
| First-run phase | Main objective | Beginner-friendly approach |
|---|---|---|
| Landing | Identify the working area | Survey nearby resources before moving far |
| Job setup | Choose a useful task | Prioritize objectives that fit available tools |
| Gathering | Build a balanced cargo | Collect practical resources before valuables |
| Defense | Protect the crew | Keep enemies away from equipment and allies |
| Extraction | Preserve acquired cargo | Depart before pressure becomes overwhelming |
Start with a controlled landing
After choosing a destination, keep the initial landing decision simple. Stay near the drop area long enough to inspect the terrain, locate basic resources, and understand where the crew will work. Moving across the planet immediately may expose you to hazards before you have a functional loadout.
Look for a practical combination of working space, resource access, and defensible positioning. A cramped location can make combat and cargo handling difficult, while an exposed one may allow enemies to interrupt every objective. The right beginner site is not necessarily the richest; it is the place where you can gather without losing control of the operation.
Choose one clear job
The job sequence should guide your first decisions. Instead of collecting materials at random, select an objective and identify what it requires. Some tasks may demand quantity, others may demand a particular material, and some may ask you to operate equipment. The exact reward and requirements can vary by version, so confirm the active contract before committing scarce tools or time.
Treat the gravhounds jobs guide as the place to review quota logic and mission structure. For a demo run, completing one contract cleanly is more valuable than attempting several objectives without finishing any of them.
Build around recovery
Extraction matters because every resource gathered only becomes a stable gain after it leaves the planet. Set aside a basic recovery plan before the danger level rises. Know where the extraction point is, keep the required equipment accessible, and avoid filling every available cargo slot unless the extra material is worth the added risk.
Landing, Resource Gathering, and Base Defense
Resource gathering becomes safer when you separate supply collecting from high-value collecting. Start with the materials required to maintain your equipment and complete the current job. Once those basics are secured, gather more valuable resources while preserving room to move and fight.
| Resource priority | Why it matters | Better timing |
|---|---|---|
| Job materials | Enables contract progress | Collect immediately after landing |
| Recovery supplies | Supports extraction | Gather before valuable cargo |
| Basic upgrades | Improves efficiency | Secure during a calm phase |
| High-value cargo | Increases potential payout | Collect only with spare capacity |
Separate supply runs from bonus runs
A supply-first approach reduces the chance that a failed expedition leaves you without basic resources. Collect what the current job and extraction process require, then assess the remaining risk. If the route is calm and your cargo remains manageable, a second gathering pass can add value without changing the entire operation.
This distinction is especially useful in the demo because a new player may not know which tools or resources are scarce. If the gravhounds beginner guide lists useful starter priorities, use those as a baseline rather than filling every available slot with unknown materials.
Keep the work area usable
A strong landing position supports both gathering and defense. Keep paths open, place equipment where it can be operated safely, and avoid allowing valuable materials to become scattered across an area the crew cannot protect. Clean organization reduces the time needed to respond when enemies arrive.
Use this practical base layout as a starting point: divide the landing area into a secure extraction zone, a Multitool operating area, and a resource cache beside the departure route. For example, run one extraction while another player guards the Multitool, then rotate the high-value cache inward before hostile contact. This layered arrangement slows enemy pressure, reduces time spent crossing exposed ground, and makes it easier to leave with recovered loot when the extraction window closes.
-
Keep the crew work zone clear of loose cargo.
-
Position the Multitool where extraction tasks can be completed without crossing hostile ground.
-
Store high-value resources close to the departure route.
-
Leave enough room to reposition rather than fighting from a corner.
-
Defend the active work area instead of chasing every distant enemy.
Layer Protection Around Active Crew
The demo’s danger comes from interrupting the crew while it is occupied with work. Enemies that reach the equipment can cause a cascade: damage slows progress, lost time increases exposure, and panic can lead to a rushed departure. A layered defense gives the crew room to finish important actions.
| Threat | Best response | Purpose |
|---|---|---|
| Distant enemy | Mark and prioritize | Prevent it from reaching the work zone |
| Approaching enemy | Interrupt at a safe distance | Protect crew and equipment |
| Close-range attacker | Focus fire quickly | Remove the immediate threat |
| Overlapping threats | Retreat toward the landing area | Avoid being surrounded |
Community experience consistently favors controlled defense over distant pursuit, although exact enemy timing may vary with platform or version. Chase only when the target is already close enough to become a problem. Otherwise, protect the objective and use the crew’s positioning to reduce pressure.
Protect the Grav Beam operator
The Grav Beam provides valuable control and combat utility, but the operator becomes vulnerable while using it. Keep a clear route behind the user, avoid forcing the beam through a narrow space, and watch the surrounding area while the operator focuses on lifting, control, or damage.
Do not treat the beam as a substitute for every weapon. Its value comes from controlling space and handling specific threats, while a conventional weapon can cover enemies that slip around the crew. For solo play, this distinction matters because one character cannot simultaneously manage extraction, defense, and every hostile target.
Gravhounds Extraction Explained: Leaving With Your Cargo
A clear understanding of extraction is essential because cargo only becomes a reward after it reaches the destination. This section explains the decision process behind gravhounds extraction explained: what to prepare, when to leave, and why “one more item” can turn a successful expedition into a failed one.
| Extraction state | Recommended action | Reason |
|---|---|---|
| Objective incomplete | Continue only if pressure is low | A finished job provides a clearer outcome |
| Cargo near capacity | Prioritize departure | Remaining mobility may be reduced |
| Route becomes contested | Use the planned escape path | Direct movement becomes more dangerous |
| Crew health is poor | Extract soon | Recovery options may be limited |
| Valuable haul secured | Leave before escalating risk | Success should not be lost to greed |
Prepare the extraction before danger rises
Treat extraction as an action to prepare, not merely a location to reach. Confirm the required tools, keep the route known, and make sure valuable cargo is accessible. Preparation should happen before enemies close the distance, because emergency repair and navigation become much harder under pressure.
The detailed extraction tips can help with route selection and cargo evaluation. The core principle remains simple: choose a path that gives the crew space to operate and offers more than one point of departure when pressure increases.
Decide with a value-and-risk comparison
A useful extraction decision asks two questions: what will the current haul contribute, and what could prevent the crew from leaving? A common mistake is to value each item only by its sale price. The true cost also includes the enemies, travel time, capacity pressure, and recovery opportunities that carrying it may consume.
A simple evaluation model is to compare the expected profit of one more gathering pass with the expected extraction loss from that delay. Calculate the haul’s remaining value after deposit fees and travel costs, then weigh it against likely enemy encounters, consumable use, and the risk of extraction failure; if a mission-worth haul has already been secured, avoiding a costly run may be more valuable than chasing another rare item.
-
Estimate the current haul’s total value.
-
Estimate the time needed to reach extraction.
-
Account for enemy density along the route.
-
Compare that risk with the value of one more gathering pass.
-
Leave when the expected gain no longer compensates for the danger.
Never wait for a perfect exit
Waiting for an entirely safe extraction can become worse than leaving during manageable danger. The right decision depends on having a route, functioning tools, and enough crew capacity to move. If those conditions exist, controlled movement may be safer than remaining in an increasingly hostile work area.
This is particularly important when playing with friends. Coordination helps identify threats and protect the operator, but the team still needs an agreed point at which everyone stops gathering and starts departing. The multiplayer guide provides additional information about organizing a party before a run.
Gravhounds How to Extract: A Repeatable Departure Plan
A repeatable plan removes the uncertainty that causes many extraction failures. Use the same sequence every time: finish the priority task, secure the haul, check capacity, mark the route, and leave before enemy pressure creates an emergency. Consistency matters because the crew can react faster when every stage has a clear purpose.
Use a staged cargo rule
Divide the available cargo into three conceptual groups. The committed cargo consists of materials needed for the job and recovery. The surplus cargo can be added when the route remains stable. The speculative cargo is valuable but expendable; it should only be collected when extraction is already secured.
Use the three cargo groups as an in-run decision gate rather than treating extraction as a single all-or-nothing objective. Keep committed cargo aboard through the danger area so the squad retains the materials required for the job and recovery; for example, preserve the extraction tool while clearing a contested route. Pick up surplus cargo only when the team can still reach the extraction point without slowing down. Drop speculative cargo first if enemies contest the route, because abandoning expendable loot preserves movement and reduces the risk of losing the essential extraction kit.
Departure Thresholds Tied to Route and Risk
Good thresholds depend on the route, crew condition, and current enemy pressure. Treat the gathering phase as a limited window rather than a requirement to fill every cargo slot: for example, if a route has no viable exit and one crew member is already covering navigation, leaving early can preserve the run. A practical set of signals includes:
-
The route ahead becomes more crowded than it was on approach.
-
The crew can no longer keep a useful distance between itself and attackers.
-
Equipment begins taking damage while the job is still active.
-
Cargo fills the remaining usable capacity.
-
One crew member begins handling recovery or navigation alone.
Any one signal may be manageable, but two together usually justify ending the gathering phase. The central idea behind gravhounds how to extract is not to defeat every enemy; it is to leave with a viable haul before pressure removes your options.
Separate the route into segments
Break the escape path into short segments: the work area, the nearest open ground, the mid-route checkpoint, and the final approach to extraction. Clear each segment before moving deeper into it. This reduces the chance that the crew becomes trapped behind enemies while focused on the destination.
| Route segment | Main check | Correction if threatened |
|---|---|---|
| Work area | Enemy distance from the crew | Stop gathering and regroup |
| Open ground | Visibility and movement space | Choose a wider detour |
| Mid-route | Continued pursuit | Use Grav Beam control if useful |
| Final approach | Extraction access | Clear blockers before interacting |
Leave a fallback route
Maintain a secondary direction whenever possible. A backup route does not need to be perfect; it only needs to offer a different line when the direct path becomes blocked. Avoid turning back into the densest area you just crossed unless the crew has a strong reason to do so.
After a successful extraction, review the route instead of immediately repeating the same pattern. Did the crew lose time at gathering? Did the threat arrive from one direction? Was the cargo too large to move comfortably? Each answer makes the next gravhounds extraction guide decision more precise.
Jobs, Equipment, and Combat Decisions
Your first demo objectives should reinforce the basic expedition rhythm. A useful contract turns exploration into measurable progress, while equipment determines whether you can gather, defend, and extract with reasonable consistency. The goal is not to complete every task perfectly; it is to finish enough work to understand how the reward system and survival pressure interact.
Read the job requirements first
Before gathering, inspect the active contract and identify its required item, target count, or operational task. If the contract asks for a specific resource, focus on that category first. If it asks for several types, prioritize the material that is hardest to replace because an ordinary resource may be easier to obtain later.
This approach prevents the common scattered inventory problem: collecting a little of everything without reaching the threshold needed for meaningful job progress. A compact, objective-focused loadout also makes extraction easier because every carried item has a clear reason to be there.
Match the tool to the task
Different tools serve distinct parts of the expedition. Use the Multitool for interaction and extraction-related tasks, and the Grav Beam for control, lifting, and weaponized utility. A conventional firearm remains valuable for straightforward damage and sustained defense, especially when the crew needs to clear a direct route.
| Need | Practical tool choice | Main benefit |
|---|---|---|
| Collect required materials | Gathering tool | Supports job completion |
| Move or interact with objects | Multitool | Broad utility |
| Control space | Grav Beam | Creates distance and disrupts threats |
| Fight a direct attacker | Conventional weapon | Predictable damage |
| Protect the crew | Coordinated positioning | Limits angles of attack |
Combat around the objective
Fighting becomes more manageable when it remains connected to the job. Avoid chasing enemies far from the work area. Instead, use the Grav Beam to slow, displace, or control threats, then switch to a conventional weapon when a target comes within a safer engagement distance.
The central rule is to protect work continuity. If one player can operate equipment while another handles threats, the crew can maintain progress. A solo player must create similar separation through positioning: use terrain to interrupt enemy movement and never let a fight drag the character away from the planned exit.
Learn from each contract
After each job, note three things: which requirement took longest, where enemies interrupted the crew, and how much capacity remained at extraction. If a job was difficult because of distance, choose a closer target next time. If the problem was an incompatible loadout, change the tools rather than repeating the same setup.
A lightweight post-run record can look like this: log the job’s outcome, time spent traveling between objectives, time spent gathering resources, and whether extraction succeeded under pressure. For example, a run that gathered nearly full cargo but lost time to a long travel loop should be labeled differently from one that extracted quickly with low cargo; this makes it easier to identify whether distance, enemy pressure, or load management caused the poor result and informs the next contract.
-
Contract completed: yes or no.
-
Primary time sink: travel, gathering, defense, or extraction.
-
Cargo remaining at departure: low, medium, or full.
-
Main threat encountered: swarms, single attackers, hazards, or pressure from multiple directions.
-
Best improvement for the next run: one specific adjustment.
This creates a learning loop because every completed contract turns travel time, gathering time, enemy pressure, and extraction conditions into evidence for the next run. For example, if a job ends with full cargo but no successful extraction, the useful diagnosis is an extraction or capacity problem—not a gathering problem. Likewise, repeated interruptions from swarms may justify a different tool loadout, while a long route between objectives can be shortened by accepting closer contracts. Comparing these outcomes gradually reveals which variables most strongly affect GRAVHOUNDS contract success without requiring perfect historical data or advanced statistical analysis.
Common Demo Mistakes and Better Alternatives
Most unsuccessful demo expeditions come from understandable priorities: gather more, fight everything, or leave at the last moment. During a Gravhounds demo, loot value matters less than protecting the run’s extraction window: choosing one confirmed extraction point, avoiding unnecessary encounters with security units, and using the remaining time for deliberate looting can prevent a profitable sweep from becoming a failed deployment. The same discipline applies to jobs—accept only contracts that fit your available time and gear, then extract before the deadline rather than chasing one extra cache and forcing a panicked escape.
Mistake: filling cargo with low-value materials
A fuller inventory is not automatically a better inventory. Unknown or low-value materials can occupy space needed for job progress, recovery, or genuinely valuable finds. Gather enough basics, then stop unless another item has a clear place in the plan.
Mistake: pursuing every enemy
Chasing distant enemies breaks the crew’s formation and leaves the work area undefended. Mark the threat, finish the current action if safe, and redirect the crew when the enemy approaches. A fight should be chosen because it protects cargo or a route, not because every enemy deserves immediate attention.
Mistake: extracting too late
The most dangerous mistake is often the simplest: staying one gathering cycle too long. Enemy density and route congestion can increase faster than the value of another item. Set a departure threshold before the pressure becomes urgent, then act on it without bargaining for one final resource.
Mistake: ignoring danger escalation
The game’s difficulty can rise as an expedition continues. Learn how danger works before relying on long runs, especially if your goal is to improve rather than simply survive. The danger and escalation guide can help explain how swarm pressure changes and when remaining on the planet becomes costly.
Mistake: treating every run as the same
A repeatable opening route is useful, but it should not become inflexible. A contract requiring rare materials may justify a different location, while a damaged crew may require an earlier exit. Adapt the route to the current objective, available equipment, and observed threat pattern.
A Complete Demo Run Checklist
Use this sequence for a clean first attempt: confirm your GravHound loadout, monitor its health and stamina, and track each extraction signal before moving deeper. For a short demonstration run, prioritize completing one paid job and returning with intact cargo rather than stacking several objectives. This keeps gravhounds demo how to play practical while showing how careful route planning can improve a gravhounds extraction guide without turning the expedition into a rigid checklist that ignores changing conditions.
Before landing
-
Review the available contract and note its core requirement.
-
Select a landing destination with nearby useful resources.
-
Confirm that the loadout supports gathering, defense, and extraction.
-
Decide which materials count as committed cargo.
During the work phase
-
Gather job materials before speculative valuables.
-
Keep the work area and escape route open.
-
Use the Grav Beam for space control instead of chasing distant enemies.
-
Protect the Multitool operator when an extraction task is active.
-
Keep the extraction route known and reasonably open.
Before departure
-
Confirm the contract requirement has been met.
-
Check cargo capacity and remove expendable low-value items.
-
Secure the most valuable materials near the crew.
-
Reassess crew condition and route danger.
-
Leave before pressure turns the extraction into a chase.
After extraction
-
Record the strongest threat and the longest delay.
-
Compare the actual haul with the planned haul.
-
Keep the successful route as a basis for the next run.
-
Change only one or two variables on the next expedition.
Frequently Asked Questions
What is the fastest way to learn the GRAVHOUNDS demo?
Complete one objective from landing through extraction, then review what consumed time and space. Avoid trying every job, weapon, and route during the first attempt. Repeatedly gathering one contract teaches the full extraction and employment loop more effectively than collecting random materials without a clear purpose.
Should players extract immediately after collecting materials?
No, but every extra gathering pass needs a defined limit. Extract when the job is complete, the required recovery gear is secured, and the route remains manageable. If enemies control the path or cargo capacity limits movement, leave before the situation becomes an emergency.
Is the Grav Beam better than a conventional weapon?
The Grav Beam is strongest for control, repositioning, and area denial, while a conventional weapon handles direct damage more consistently. Use the beam to protect the crew or create an opening, then bring a firearm into play when a target enters a reliable firing position.
How do co-op players divide responsibilities during extraction?
Assign one player to navigate and secure the route, one to protect the Multitool operator, and the others to gather or cover threats. Everyone should agree on a departure threshold, because individual players may otherwise continue collecting while the group loses its safest exit.
What should a new player do after a failed demo run?
Review the failure rather than changing everything at once. If extraction was the problem, carry less cargo; if combat interrupted gathering, improve positioning and use the Grav Beam for control; if job progress was slow, choose a closer target or a contract that matches available resources.