
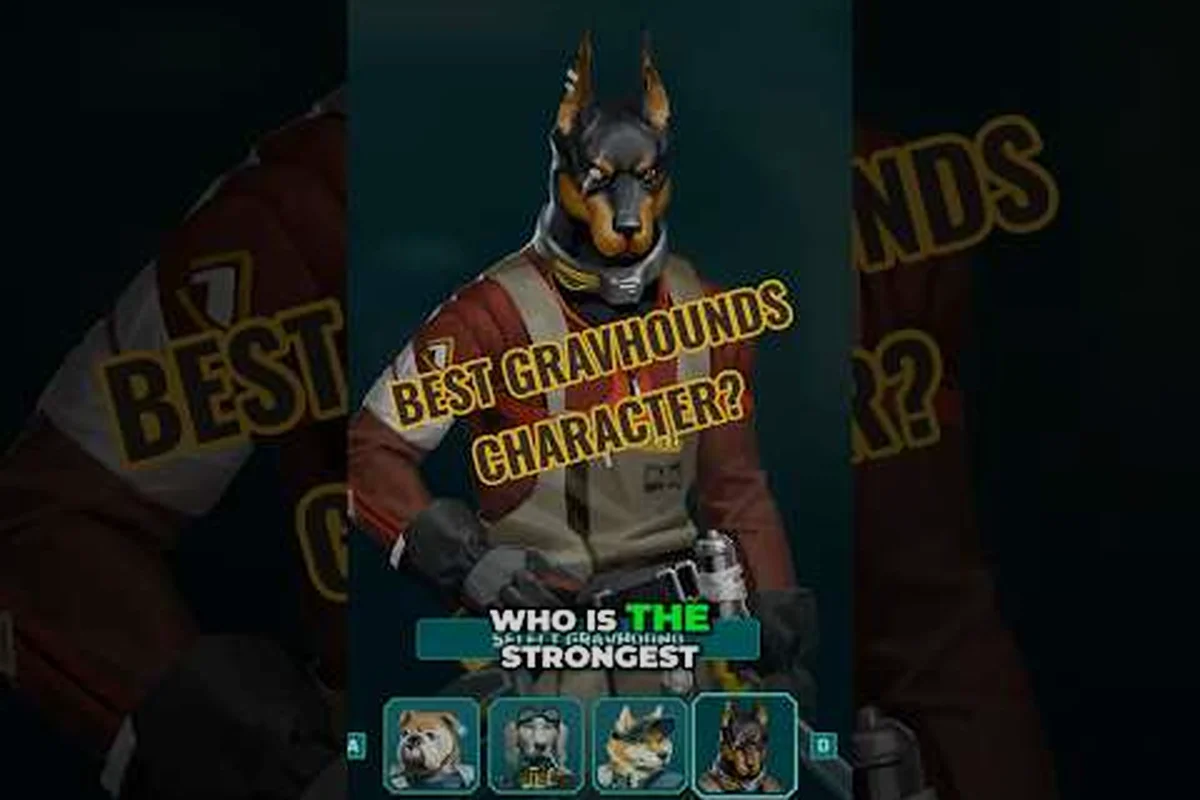
The fastest answer to how to get more gravhounds is that the roster is intentionally small: the playable crew is a fixed pack of bio-engineered canine workers, not a collectible army you grind out one unit at a time. The official GRAVHOUNDS Steam page names four playable units for the early rollout — Selene, Zane, Dozer, and Finn — and the game frames the pack itself as the core unit rather than any single hero.
That design choice matters because it changes what "more" means. You are not farming currency for a fifth dog; you are unlocking the full four-hound roster, learning how each character's kit stacks with the others, and building squad compositions that cover every role a drop demands. This guide breaks down who the Gravhounds are, how unlocks actually work, and how to squeeze maximum value out of the crew you have.
Who Are the Gravhounds and Why the Roster Is Small
The Gravhounds are presented as engineered working dogs bred for hostile off-world shifts, and the official marketing leans into a grim tagline about loyalty, obedience, and expendability. That framing is not just flavor — it explains why the roster is capped at four. Each hound is a specialist tool, and the game expects you to combine strengths in co-op rather than main a single favorite.
Understanding this structure is the first step toward getting more out of your crew. If you expect a gacha-style unlock treadmill, you will misread the progression entirely. Instead, think of the four hounds as four loadout slots you gradually earn access to.
-
Selene — the most recognizable face of the roster and a strong all-around pick for players learning the Grav Beam.
-
Zane — a combat-leaning hound whose kit rewards aggressive positioning.
-
Dozer — the heavy option, built for absorbing pressure while objectives tick down.
-
Finn — a utility-flavored pick that rounds out flexible squad compositions.
| Hound | Confirmed Status | Likely Role | Best For |
|---|---|---|---|
| Selene | Demo + Early Access | Balanced / versatile | First-time players |
| Zane | Demo + Early Access | Aggressive combat | Players who push fights |
| Dozer | Demo + Early Access | Tank / anchor | Holding objectives |
| Finn | Demo + Early Access | Utility / support | Flexible squads |
Because only these four are confirmed, any guide claiming a secret fifth hound is speculation. Treat roster expansion as a patch-by-patch question and check the official channels before believing a leak.
How Unlocking More Gravhounds Actually Works
The unlock path is tied to playing the game rather than paying for it. Based on the official gameplay overview from ID@XBOX on YouTube, the loop is built around 1-4 player co-op drops, base construction with turrets and pipelines, Grav Beam physics combat, and an extract-with-the-loot finale. Crew access grows as you engage with that loop, not through a separate storefront.
Community reports suggest the demo gates part of the roster behind early progression milestones, so the practical advice is simple: finish the tutorial drop, complete your first successful extraction, and keep playing shifts. The Selene and crew unlock guide walks through the character-specific steps if you want a tighter breakdown of each hound's availability.
The Unlock Checklist
Work through these in order and you will have the full confirmed roster available without wasting shifts:
-
Complete the opening tutorial drop so the game registers your profile and crew menu.
-
Finish at least one successful extraction to unlock the broader loadout and character interface.
-
Play a shift with each starter hound to reveal their ability tree and upgrade options.
-
Check the crew screen after every major milestone, since unlocks can appear without a loud notification.
-
Watch official news posts for roster additions, because Early Access patches are where new hounds would arrive.
What Does Not Unlock Hounds
Spending in-game currency on cosmetics will not add characters, and there is no evidence of a paid character pass in the confirmed materials. If you see a video promising a "fifth Gravhound unlock," verify it against the official site before investing time. The safer assumption is that the pack stays at four until the developer says otherwise.
Gravhounds Team Synergy: Making Four Hounds Feel Like Eight
The real answer to getting "more" Gravhounds is synergy. A well-built pair or squad multiplies effectiveness far beyond what any single hound can do, and the game explicitly supports stacking bonuses and reshaping loadouts mid-shift. According to the Steam page, teams can stack bonuses and adapt to the swarm's escalation as protection demands and objective pressure climb — that mid-shift flexibility is the differentiator versus fixed-loadout extraction shooters.
That means your job is not to collect hounds but to combine them. A Dozer anchoring a pipeline while Zane clears with the Grav Beam and Selene repositions is worth more than three players all running the same aggressive build.
| Composition | Core Idea | Strength | Weakness |
|---|---|---|---|
| Dozer + Zane | Anchor plus damage | Strong in tight defense | Thin utility |
| Selene + Finn | Balanced plus support | Flexible across objectives | Lower raw burst |
| Dozer + Finn | Sustain plus utility | Great for long shifts | Slower clears |
| Selene + Zane | Mobility plus aggression | Fast objective pressure | Fragile if split |
Stacking Bonuses Mid-Shift
The upgrade system lets you reshape loadouts as the swarm escalates, so synergy is not locked at drop time. If your duo starts strong but stalls against a heavier wave, reallocate bonuses toward protection and area control rather than raw damage. Players who treat upgrades as a one-time choice tend to fall behind around the midpoint of a shift, while teams that re-tune together keep pace with the difficulty curve.
Gravhounds Duo Combos That Cover Every Gap
Duo play is where synergy shows up most clearly, because two hounds must cover damage, defense, and utility between them. The cleanest approach is to pair one hound that holds ground with one that creates space, then let upgrades patch whatever the pair lacks.
-
Dozer plus Zane — the safest aggressive duo. Dozer absorbs swarm pressure near the objective while Zane converts that space into kills with the Grav Beam.
-
Selene plus Finn — the most forgiving duo for newer players. Selene carries general combat while Finn fills utility gaps, so neither player is punished for a slow start.
-
Selene plus Zane — a high-tempo pairing for confident players who want to finish objectives fast and extract early rather than grind a long shift.
-
Dozer plus Finn — a slow, sturdy combo that shines when protection demands spike and you need to keep pipelines alive.
If you want a data-driven ranking of which pairs currently perform best, the GRAVHOUNDS best team composition breakdown compares duos and four-player squads after the latest patch. Pair choice matters less than role coverage, though — a mismatched duo that communicates will beat a meta duo that splits up.
Positioning Rules for Duos
Keep the anchor within turret range of the objective, and never let both players leave the base perimeter at once. The extract-with-the-loot loop punishes greed, so designate one player as the runner and one as the fallback. When the swarm escalates, the fallback player calls the retreat and both move together rather than trickling out one at a time.
Gravhounds Squad Composition for Four Players
A four-player squad should never stack the same role twice. With the full confirmed roster, the cleanest structure assigns each hound a lane: Dozer anchors, Zane pressures, Selene flexes, and Finn supports. That division keeps the base functional while still letting the team push objectives.
| Slot | Hound | Job on the Drop | Upgrade Priority |
|---|---|---|---|
| Anchor | Dozer | Guard pipelines and turrets | Protection, area control |
| Pressure | Zane | Clear swarms, push objectives | Damage, Grav Beam efficiency |
| Flex | Selene | Rotate to wherever the line breaks | Balanced combat stats |
| Support | Finn | Utility, repairs, resource flow | Utility and sustain |
Rotating Roles When the Swarm Escalates
Mid-shift escalation means static roles eventually break. When protection demands climb, pull the flex player back to reinforce the anchor and let the pressure player fight closer to base. This rotation keeps the team from being spread thin, and it is the single most reliable habit for surviving late-shift waves. The progression and survival guide covers how to time those rotations against upgrade windows so you are never re-tuning mid-fight.
Practical Tips for Expanding Your Effective Roster
Getting more Gravhounds is partly about unlocks and mostly about depth. Every hound has an ability tree worth exploring, and a fully upgraded Selene plays very differently from a fresh one. Spend a few shifts deliberately testing each hound's kit rather than defaulting to your favorite, because the game rewards knowing what your teammates can actually do.
-
Learn one hound's upgrade tree completely before spreading attention across all four.
-
Practice the Grav Beam's physics interactions in a low-pressure shift so you understand how objects and enemies behave.
-
Build turrets and pipelines early; base infrastructure buys the time your squad needs to experiment.
-
Extract with loot even on short shifts, since consistent extraction is what compounds crew progress.
-
Re-check the crew menu after patches, as Early Access updates are the most likely source of roster changes.
The official GRAVHOUNDS website remains the canonical source for platform and roster claims, and it is worth a look before you trust any third-party list. For players who want to push individual hound performance further, the weapons and Grav Beam guide explains how loadout choices interact with each character's strengths.
Bringing the Pack Together
The honest takeaway is that you will not unlock a dozen Gravhounds, and you do not need to. The confirmed roster of Selene, Zane, Dozer, and Finn is designed to be combined, upgraded, and re-tuned mid-shift, and that flexibility is where the depth lives. Focus on unlocking the full crew, learning each hound's role, and building duo or squad compositions that cover damage, defense, and utility without overlap. Do that, and four hounds will carry you through far more content than a bloated roster ever could.
Frequently Asked Questions
How many Gravhounds can you unlock?
Four are confirmed for the demo and Early Access: Selene, Zane, Dozer, and Finn. The official Steam page frames the pack as the core unit, so treat any claim of additional hounds as unverified until the developer announces a roster update through official channels.
Who are the Gravhounds in the game's story?
They are engineered canines conditioned for hostile off-world work, and their demo marketing leans on loyalty, obedience, and expendability. Each hound is a specialist rather than a hero, which is why the game pushes players toward combining crew strengths in co-op rather than maining one character.
Is Selene the best Gravhound to start with?
Selene is the most forgiving starting pick because her kit is balanced and teaches the Grav Beam without demanding aggressive positioning. Players who prefer pushing fights may click with Zane faster, but Selene remains the safest first choice for learning the drop-and-extract loop.
Do Gravhounds duo combos matter more than individual upgrades?
Both matter, but role coverage wins early. A Dozer and Zane pair that splits anchor and pressure duties will outperform two identical aggressive builds. Once roles are covered, stacking upgrades mid-shift to match the swarm's escalation is what keeps a duo competitive late in a run.